Category: Garden

  • The best way to Grow Lilies in Crates

    The best way to Grow Lilies in Crates

    Lilies are famous for amazing blooms and their large, which which frequently emit a fragrance that is delicious. Using a crate is a useful strategy to develop several types including tulips and lilies. Crates make managing weeds, pests and drainage more easy. It’s possible for you to use the delivery crates the bulbs arrived in, choose for buying a wood crate that is more attractive or use a wine crate. Crates could be moved about, making them a colourful and flexible accent to your own garden.

    Locate a crate. It will be at least 8″ deep, although the crate can be any dimension.

    Line the inside of the crate, up to the very best edges, with newspaper. You can substitute white or brown butcher paper. Use two or three sheets to ensure that you just don’t drop potting or substrate soil from sides or the bottom of the crate.

    Add a substrate that is commercially-made or substitute a home-made combination of coarse peat equal elements leaf compost and perlite or sand, in line with the University of Maryland Extension. A 2 inch layer of the compost or substrate combination on the base of the crate.

    Place your lily bulbs using the pointed end facing up in the underside of the crate, but leave at least 2″ of space-per bulb. Cover the bulbs with about 6″ of potting soil. Don’t pack the soil tightly; abandon it ethereal and somewhat loose.

    Keep the soil. Do not spray the leaves, although water your lilies in the bottom of the crops. Lilies are relatively susceptible to diseases, when leaves are wet for lengthy durations, like blight, which may develop.

    Place your lilies that are crated in full-sun, where they’re able to receive a T least four hrs of sunlight per day. You may notice the stems achieving and leaning toward the sunlight if circumstances are also shady. Lilies might become pressured if temperatures are ex-treme. Most lilies favor temperatures of 55 to 75 degrees Fahrenheit. .

    Unless the plant fades deadhead the invested flowers with pruning shears, however don’t trim the foliage.

  • Acidity to be Increased by mulches

    Acidity to be Increased by mulches

    Different crops grow best in soils with pH ranges that are various. Some crops, like rhododendrons and blueberries, choose soils that are acidic. Gardeners who reside in areas with soils that are alkaline or who want to develop crops that prefer soils might require to improve their soil acidity to help crops develop. Unfortunately, composts and most mulches make soil less acidic. Several types of mulches, nevertheless, improve soil.

    Sphagnum Peat Moss Mulch

    Peat moss makes soil more acidic. Adding 2.5 lbs of peat moss per square yard will improve the soil pH by about one-unit. Either include the moss right to the soil or include before applying compost, the moss to compost. Sphagnum peat moss retains in air and water, enhancing the texture of soils that are extremely sandy or extremely large. Peat moss is a fantastic medium for starting seeds.

    Pine Needle Mulch

    Pine needle mulch raises the acidity of soil. Pine needles are handy, because they can be raked by several individuals up. Buy pine needle mulch from a shop, include pine needles into a compost pile, to use pine needle mulch or combine some pine needles to the soil using tiller or a fork.

    Pine Bark

    Bark is contained by mulches, and mulches with bark aid in increasing soil. Bark mulches help the soil reduce erosion, hold in moisture and keep soil temperature secure. To use pine bark mulch, merely utilize an inch of the mulch to the the top of soil around plants. The mulch as it reduces and blends in with all the soil over time.

    Oak Leaves

    Oak tree leaves become more alkaline and initially breakdown. However, soil become acidic over time is made by the ongoing use of oak tree leaves. Since oak leaves are relatively big, chop them before using them up. Go over them having a mower after which one efficient strategy to produce oak leaves smaller is to rake them in to one region of the lawn for example in San Diego. Add them to mulch after chopping them, a-DD them into a compost pile or use them to the soil area.

  • The best way to Grow Butterbur

    The best way to Grow Butterbur

    The butterbur (petasites hybridus) is a perennial plant with Asian origins. It’s most commonly known for the natural characteristics of it’s. Root extracts in the plant are usually employed to handle spasms, pain, fever, migraines and asthma. Another common title for the butterbur plant is “sweet coltsfoot.” The plant grows best in damp marshy soil. The butterbur grows foliage and blooms in the spring. The plant thrives in U.S. Department of Agriculture Plant Hardiness Zone 4-to 9. On average, the plant grows up to 9-feet tall and 3-feet wide.

    Locate an area which is moistened to plant your butterbur seeds. The planting area needs to be shaded or partially shaded. Be certain the location has enough space for the butterbur to distribute and develop.

    Check the planting area to make sure the soil has a pH level ranging from 5.6 to 7.8. The soil can be of a sandy, loamy or clay makeup.

    Plant your butterbur seeds in a hole that’s ¼ to ½ inch. Cover your seeds.

    Plant the the rest of your butterbur seeds. Depart at least 5 feet of room between each hole when planting. The additional room is required as the butterbur is a spreading plant that was wide. The leaves can extend up to 2-feet broad. It quickly spreads throughout your backyard once it begins to increase.

    Feed your butterbur a dose of fertilizer 2-5 times throughout the summer months. Be certain the fertilizer is has the correct balance of phosporus nitrogen and potassium. For optimum progress

    Once every 2-3 months to assure the soil stays moist water your butterbur plant. More regular waterings are required in the event the soil dries out between waterings.

  • The best way to Get Cleared of a Sage

    The best way to Get Cleared of a Sage

    A challenging, vigorous perennial, Russian sage (Perovskia atriplicifolia) has a status for flourishing where no other crops will increase. This semi-woody shrub is drought-tolerant and disease-resistant and lives in Afghanistan. It has insect predators does nicely in full, warm sunshine and will survive in soil. The plant usually seems in U.S. Department of Agriculture plant-hardiness zones 4 to 9 where it’s employed to line backyard borders and as big accent crops thanks to its lacy silver gray foliage and delicate spires of light purple blooms. As a result of widespread sucker development, Russian sage crops can swiftly become become invasive in a little or flower bed garden and you will need to eliminate it from your garden every so often.

    Overwater your sage plant to induce wellness that is poor health insurance and root-rot. Sage does badly in moist soil problems with bad drainage, and and finally dies from winterkill. It is possible to remove the stump stays out of your garden when the plant dies.

    Cut the plant down to the stump to merely dig it from the ground. Moisten the soil round the stump to loosen up it, then pull the root-system out. Maybe not your compost heap, or the plant may start expanding again.

    Treat the plant with the herbicide to destroy it, utilizing a product that includes prodiamine. Use the herbicide to the leaves of your sage before it starts to flower in mid-summer.

    Remove any sucker off-shoots that shoot up up in the location where your sage initially grew. Pull out the suckers by hand and place them to the trash. Handle the floor location with herbicide where suckers are intense.

  • The best way to Control Leafspot on Maple

    The best way to Control Leafspot on Maple

    A Japanese maple (Acer palmatum) offers striking colour in gardens and landscapes and grows in U.S. Department of Agriculture plant-hardiness zones 6 through 8. This generally hardy tree is vulnerable to issues, specific pests and illnesses like leaf spot. Leaf spot-on maples produces an ugly look which could distract from the natural beauty of the tree and is usually a symptom of tar or phyllosticta place. Leaf place are more of an annoyance than a significant danger and is usually not dangerous to the existence of the tree. Leaf place doesn’t warrant the use of fungicide and as an alternative upkeep and care of the maple is the greatest protection against this illness.

    Examine the leaves to help determine the particular cause of the places. Yellowish places that change black and tar-like to look at in summer are usually created by tar spots. Phyllosticta create as tan, round spots using a purple or red edge. Sometimes issues, including mites or pests, can trigger places to to happen. To rule out these, analyze the maple for other pests or mites.

    Rake leaves, twigs and other debris and about the maple. Dispose of the plant particles by possibly putting it or burning the plant issue and stuffing it into a rubbish bag. Don’t spot the particles in a pile. Once every week or everyother week to keep the pathogens repeat frequently.

    Water Japan maple in the day and avoid allowing the foliage to become damp. Watering the tree provides time to dry any extra moisture on the leaves ahead of the sun falls to the sunshine. Wet foliage leaves the tree open to injury.

    A 0-10-10 the Japanese maple the cold temperatures and a light feeding an all purpose organic fertilizer the spring. Fertilizer helps helps helps maintain the maple wholesome and enables it to fight off diseases, any pests or fungus.

    Treat serious leaf place dis Ease that’s affecting the progress of Japan maple using a fungicide for managing phyllosticta and tar place developed. Fungicide was concentrated by mix as mentioned in the directions using the proper a-Mount of water. Use the fungicide to Japan maple since the the foliage totally. Only use fungicides on a calm day when temperatures aren’t predicted to surpass 90 levels Fahrenheit. Most fungicides need another treatment 7 to fourteen days following the first remedy. Follow the utilization instructions explained on the bottle for most useful results.

  • Factors Affecting Development of Fruit Trees

    Factors Affecting Development of Fruit Trees

    Fruit-trees that are growing needs plenty of TLC, but your efforts will likely be rewarded using a crop of cherries, oranges, apples or another treat. For trees that bear plenty of fresh fruit, numerous elements impacting development come in to play, producing the distinction between types and trees which can be successful and healthy.

    Sunshine

    With the majority of species requiring six to eight hours of full-sun every day exposure to sunlight is important the development of fruit-trees. Planting fruit-trees in a shady location results in weak trees that create flowers and fruits, in accordance with the College of New Hampshire. The trunks of trees that are free burnin bright sunlight and needs to be painted using a protecting layer of white or white wash latex paint, diluted with water to its strength that is regular.

    Soil

    Proper soil is essential to the survival and development of fruit-trees. If planted in soggy the roots of fruit-trees will rot, obstructing advancement and progress. Loam soils are best, as they drain rapidly though apple, plum and pear trees can withstand moister soil than other fresh fruit tree types. Avoid planting fruit-trees in clay soil, which prevents roots from correctly using maintain.

    Fertilizer

    Fruit trees have fertilization requirements that are various than trees. Applying a typical 4-1-1 fertilizer with nitrogen, phosphorus and potash to fruit trees results in heavy foliage growth, but few flowers and fruits, %1pical 4-1-1 fertilizer with nitrogen, phosphorus and potash to fruit trees results in heavy foliage growth, but few flowers and fruits, according t4-1%1ing a typical 4-1%11%1ing a typical 4-1-1 fertilizer with nitrogen, phosphorus and potash to fruit-trees outcomes in large foliage development, but few flowers and fruits, according to This Old House. Give a fertilizer to fruit-trees using a reduced quantity of nitrogen, half that should be water-insoluble. This type of fertilizer reduces gradually, offering fruit-trees having a constant diet of the nutritional elements needed for regular, development that is paced.

    Weeds

    Fruit-trees and weeds really are a match that is poor. The roots of trees are ill equipped to take on weeds for water and nutrients, which leads to inadequate development. The roots of trees experience when weeds prosper, as they need to reach further to the floor, away in the nutrient-rich best 2-feet of s Oil. Weeds steal nitro Gen, producing fertilizing ineffective. Additionally, rodents and numerous pests conceal exposing trees to damage.

  • The best way to Plant Next into a Building

    The best way to Plant Next into a Building

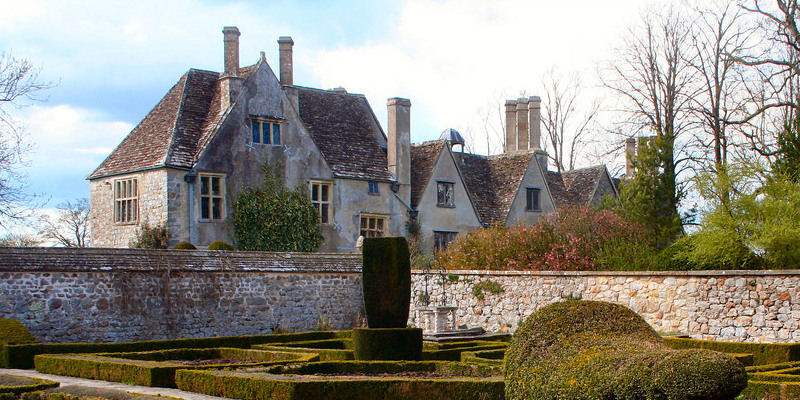
    Buildings without landscaping absence in natural splendor when compared with well-landscaped properties. Plants aid to soften the severe lines of homes and properties and include colour around foundations. Together with the addition of trees, several shrubs and flowers, a recently-built building can seem like it’s been standing for years as it blends together with the surrounding vegetation. Plants help to absorb dampness around foundations, decreasing drainage issues to keep the building dry. Spacing is the most crucial aspect to consider when planting next to structures. Each plant should have space to develop to maturity.

    Before you plan your landscape style call a utility locator support and begin digging holes for trees, shrubs and flowers. They mark around the building basis for under-ground utility lines including fiberoptic cables, primary water-pipes, sewer pipes that are primary, primary electrical support and natural gas-pipes. Puncturing one of these can lead to even personal injuries or death and damages.

    Grade the soil from the basis of the building when planning the soil for planting alongside a building. Grading the soil far from the building permits water to run off the soil, avoiding harm to the the building blocks from standing water.

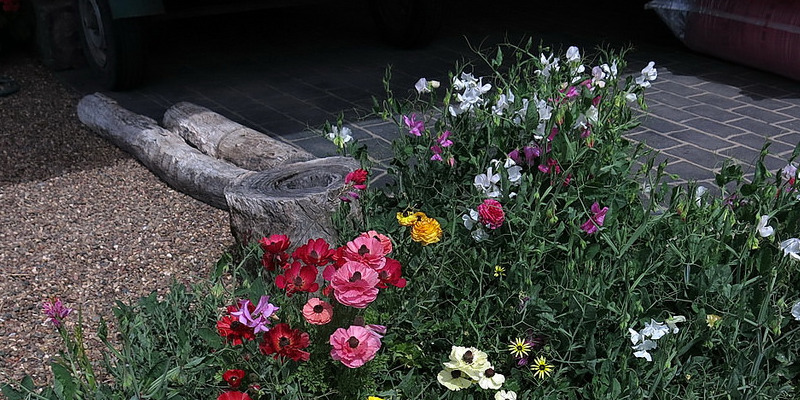
    Keep a minimum of one foot away from siding to the soil. Soil and water against a basis may damage siding, creating rot, mildew and mould; from harming the house, it also helps to prevent rodents. It’s possible for you to construct a raised bed or install plastic sheeting from the the building blocks to serve as a barrier involving basis and the s Oil.

    Choose crops that complement the architectural styling of your home’s and with measurements that match the the dimensions of the constructing. Foundation crops, including medium shrubs, conceal the ugly stone, concrete or cement block foundation and aid body properties. Visualize numerous crops, fit and flowers, timber will appear throughout the constructing to gain a thought of what things to plant to most readily useful use the the room a T total maturity you’ve.

    Consider the dimension of the root-system of a plant a T maturity when picking what things to plant and the way far they need to be planted in the foundation. It’s possible for you to install crops with root techniques that are little, like flowers, as near as 6″ out in the building foundation. Several toes are left by plant little shrubs at least 1 foot from your foundation or for big shrubs for example viburnum. Roots might entice bugs, if crops are too near to the basis of a building, for example termites, leading to infestation.

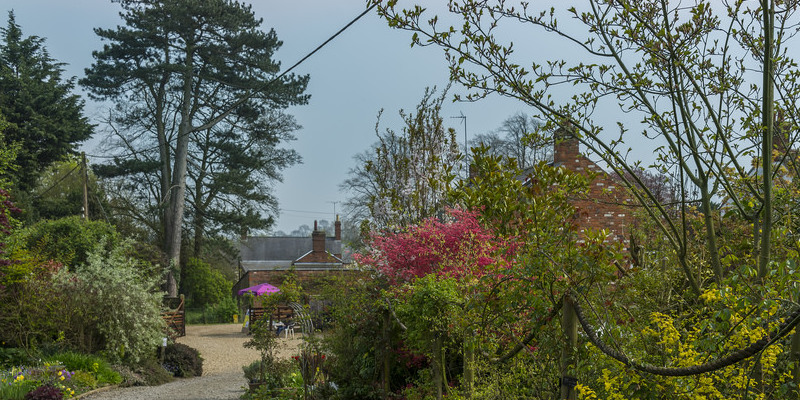
    Plant trees significantly enough from a constructing to permit area for the roots to broaden and hence as the tree grows, the canopy does not interfere with the roof line. Planting trees also near to properties prospects to stunted tree development and harm to the basis of the building’s. As an overall rule, plant little trees up to 3-0 toes tall 8 to 1-0 toes a-way from your building, plant medium trees between 3-0 and 70 toes a-T least 1-5 toes in the building and plant taller trees a the least 20-feet from your building. When planting in the corner of a building, plant little trees 6 to 8-feet a way, 1 5 feet a-way and 12-feet a-way for medium trees for huge trees.

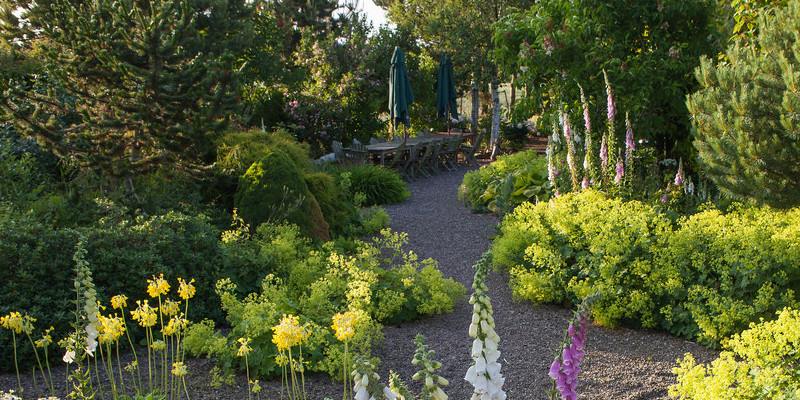
    Plant tall crops for example oak, cyprus to provide the illusion of peak to the house or juniper. Columnar shrubs or trees, including arborvitae, planted in the corner of the residence mix them in the around landscape and soften structures. Avoid planting shrubs and tall trees in the front of windows s O normal sunlight is not blocked as crops achieve maturity.

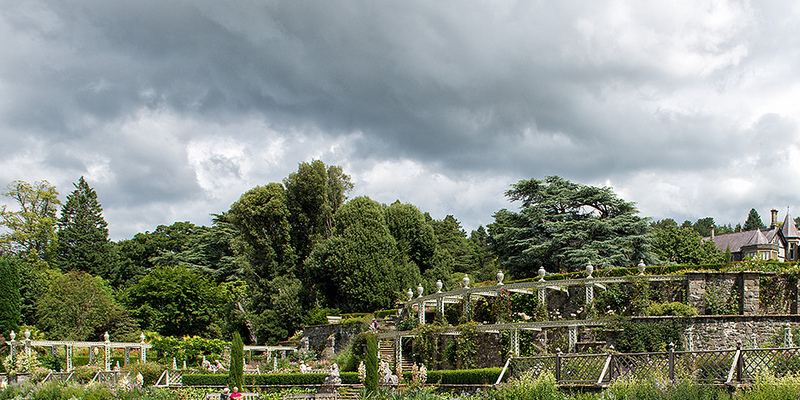
    Plant the different plant type-S in buy of descending peak from the building. By way of example, you may plant medium-sized shrubs in the rear of of a flowerbed, a-DD AROW of little shrubs in entrance, then contain perennial or yearly flowers in the front-row. The layering of crops will produce a little building seem greater and softens harsh lines.

    Plant in accordance with the sunlight requirements of every plant. Plants that need full-sun ought to be planted on a south- or west-facing wall, while people who prefer shade are greatest north- and east-facing partitions. When you plant a shade-loving plant in full-sun, it needs added treatment to guard the plant.

    Prop a related or trellis framework contrary to the side of the residence to train climbing crops, including clematis and roses, to increase vertically.

    Cover the s Oil around all crops with 2 to 4″ of mulch to stop weeds and help with dampness get a grip on.

  • The best way to Treat a Frost-Bitten Lawn

    The best way to Treat a Frost-Bitten Lawn

    Some folks operate to protect their tender garden plants when frost is forecast, while the others expect the best and place their feet up having a great guide. But few feel about the garden. That’s because grass, whether great-time Kentucky bluegrass or warm-time Bermuda grass, grows from an underground crown; only the blades experience frost bite. Frosty evenings are unusual in Mediterranean climates that are moderate.

    Wait for before stepping on the grass, the sun to to go up high in the sky as well as the temperature to to go up — and that goes for the paperboy, also. Frozen blades bruise or split easily and are brittle.

    As it dries out water the garden to the depth of 1-inch in a day or two. Dampness that carries the carbohydrates made by photosynthesis is crystallized by freezing. Hydration plummets because these crystals evaporate in the morning air and lay on on leaf surfaces.

    Mow your lawn after it starts to develop after dark browning and has started to increase again. Move the mower setting up 1/2 inch or more, depending on the kind of grass. Never scalp a garden that is re-covering. Leaves that are longer assist create shelter crowns and more carbs from frosts that are extra.

    Rake your lawn to eliminate blades that are dead in the event the freeze killed huge patches of grass or continues to be hard. Particles from grass blades plays a role in the the synthesis of of thatch although crowns endure cold snaps effortlessly.

    Delay fertilizing the garden for up up to month. It would be damaged by an over-dose of nitrogen in addition to dehydration more.

  • Simple Steps to Successful Apple Trees

    Simple Steps to Successful Apple Trees

    Apple trees are temperate zone fruits, which suggest they require a specific amount of winter each year. In line with The New Sunset Western Garden Book, “Most require 50 to 1000 hours of winter chill,” which is between 35 to 45 degrees Fahrenheit. In mild winter areas, pick apple types that need a reduced quantity of chilling to be effective, like Pettingill, Gordon and Winter Banana. It will take a freshly planted apple tree total creation to be achieved by four to five years. Productivity can be encouraged by just several easy steps on all sorts of apple trees, mature or recently planted.

    Pruning

    Apple trees re-directs the expanding power to fruit and the main branches spurs. The best time is when the tree is dormant in the late-winter or early spring. Removing the lifeless, weak or interfering branches, which increase towards the middle of the tree, opens up the crown to mild. Apples are produced by Apple trees with the open crown. New development in the locations that are pruned can continue to produce fresh fruit for two decades and indicates the development of new fresh fruit spurs, which are the most vigorous three years after developing.

    Fertilizing

    Apple trees when they’re not developing and creating as nicely as they’re meant to. Before the tree wakes up the best time is in the spring right. Use 101010 well-balanced over the root zone, which is from the drip line. trunk to a few inches beyond the Recommended quantities are 1 lb. for the firstyear, 2 lbs. for the 2nd year, 3 lbs. For 5 to 6 lbs and the third-year. For trees that are mature. Keep 6″ in the trunk to the fertilizer, hence the tree is not burnt by the chemicals. Water the area properly using a soaker hose.

    Pollination

    Apple trees require cross-pollination to create an ample crop of fresh fruit. Here is the practice of planting a lot more than one range near each other. Crab apple types make excellent pollinators make sure the two varieties have a comparable time that is blooming. If including still another tree isn’t practicable, then spot a branch of blossoms or a bouquet from a different variety in a central location and allow the bees do their perform.

    Thinning

    The practice of good fresh fruit thinning improves taste, quality and the dimension of the apples. It stops branches that are over loaded . Start in the first summer, following the tree sheds small good fresh fruit and the flowers have appeared. The center apple from any ruined good fresh fruit and each cluster is eliminated. In mid-summer slender the clusters therefore the apples are spaced 4-to 9″ aside, with regards to the dimension of the good fresh fruit.

  • Egyptian Papyrus Planting Tips

    Egyptian Papyrus Planting Tips

    Egyptian papyrus (Cyperus papyrus) is a huge wetland plant renowned because of its use in creating paper-like papyrus throughout biblical times. The plant is extremely helpful as a spectacular landscape accent in areas which are wet today. A member of the grass-like sedge family, Egyptian papyrus is a tender perennial ideal for outside use in U.S. Department of Agriculture plant-hardiness zones 9 through 15.

    Characteristics

    Papyrus is indigenous to Africa, where it grows in the edge of the water found frequently along the Nile. It types clumps of triangular green stems via woody rhizomes that are under-ground. Each stem is topped by means of an umbrella-shaped arrangement of several thin rays that constitute the inflorescence of the plant. When the plant blooms, clusters of green to brown flowers appear in the ends of the rays. Fruits that resemble little nuts that are brown change the flowers. Egyptian papyrus reaches a peak of 6 to 10-feet, even though the dwarfed cultivar “Perkamentus Compact” grows to only 2 to 3-feet tall.

    Planting

    Choose an area for the papyrus plant. A pool containing about 2″ of water is appropriate. To plant in water, you could put your plant in a pot of soil elevate the pot on a 2nd pot in the water or on bricks. The plant will do nicely if grown in a normally moist place like the moist bank of a pond or lake or a stream. It prefers rich soil at acid pH but will do nicely if grown in clay or soil, supplying moisture is plentiful.

    Requirements

    Papyrus is best suited to locations that receive partial shade, even though it is going to tolerate full sunlight. The plant is normally fast growing and can benefit using a method specified for plants from fertilizing. All these are usually accessible as rods or spikes, which is often pushed to the soil for slow-release. Your plant spread nicely in the event that you eliminate broken or brown stems throughout the growing period and will appear its finest.

    Propagation

    Papyrus grows swiftly and types huge clumps. You could divide a clump by reducing using a shovel into it or noticed, continuing the slice to create several split up divisions. Plant solitary divisions in areas that are new to improve your selection. Papyrus creates new crops obviously when stems ideas and arch drop below the water. Plantlets create from these submerged stems, showing as tiny green crops that moved to new places and can be separated from the parent plant.