Author: Aved1961

  • Tips on Growing Grass in Shady Areas

    Tips on Growing Grass in Shady Areas

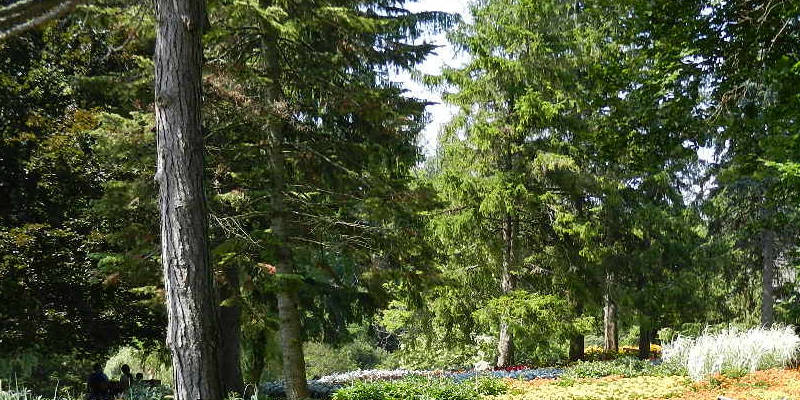
    Shady places in your landscape produce difficult growing problems for sunlight- crops like grass. If options like shady or mulch groundcover crops are not attractive, additional work can help with developing grass under trees, near buildings and in other places. When you you utilize these grass development methods that are shady, you may need to change your expectations.

    Choose the Best Variety

    Not all grass types are suited to patches that were shady. Visit a local nursery to learn more about the shade-tolerate types for the area. The University of California Cooperative Extension suggests St. Augustine grass, zoysia grass or fine-leaf fescue types like creeping red fescue. These grasses tolerate problems that are developing than other grass types. It is possible to also discover mixes of grass seeds which are made especially for locations that are shady.

    Maximize Mild

    All grass types develop with exposure to sunlight, therefore your garden is benefited by maximizing the mild to the places. Therefore more sunlight reaches the grass trim back the branches on the trees in the lawn. Keep them pruned instead of allowing them to grow tall to decrease the shadiness for those who have shrubs in your landscape. Fallen leaves and organic particles from shrubs and trees also block. Clean these products up frequently so the grass is not smothered or missing sunlight.

    Water and Fertilize

    Grass wants fertilization and sufficient water, particularly in shady places. Grass around trees should take on the tree roots for nutrients and water. This grass receives less rain than grass in a area that is open as the tree branches and leaves block the water. Watering at regular intervals, rather than frequent shallow watering, gives the water required for for the grass as well as the tree roots. Fertilization recommendations differ by grass range, therefore consult together with the nursery employees when you select your grass.

    Let it Develop

    The photosynthesis process employed to produce nutrients for the grass is slowed by the absence of sunlight. Mo-Re area which supports photosynthesis is provided by leaving the grass. Sunset suggests leaving the grass in shady are as to increase an inch that is additional. Cut-no mo-Re than 1/3 of the grass-blade size., when you mow the location

    Overseed the Region

    Due to the problems that are growing, grass in shady are as is probably to slim out, resulting in patches. Overseeding the patches that are shady assists fill-in the locations that are slim to renew the garden. For the seeds to develop properly, they need immediate con-Tact together with the soil. Remove particles and lifeless grass before sowing the grass seeds by raking the region. Keep the s Oil moist to motivate progress of the seeds.

  • The best way to Install a Soap Dish in a Fiber Glass Shower

    The best way to Install a Soap Dish in a Fiber Glass Shower

    Showers consist of a preformed device produced from gel-coated fiberglass. Unlike installing soap dishes in shower partitions, which needs drilling screw-holes through tile and to the wall or dry wall studs, fiber glass showers have soap dishes. This is because fiber glass shower partitions can crack and are not strong enough to withstand drilling or strengthened, which might be costly to repair. Rather than using screws to install a soap dish, glues are employed to affix it to the fiber glass shower wall.

    Adhesive Backing

    Clean the fiber glass let them air-dry and shower partitions.

    Measure 16-inches below the showerhead on the wall. Measure 8 to 10″ to the right or left from the 16-inch stage and spot a bit of masking tape. This can be where the soap dish will soon be installed. When you install a soap dish using a removable adhesive having a pulltab, the soap dish A15-inch area beneath it for one to be in a position to pull down the tab and eliminate the adhesive.

    Wipe down the area where you put the tape with a cloth as well as rubbing alcohol.

    Remove the liner in the adhesive strip on the soap dish. Press the strip, when it’s not already installed and eliminate the 2nd liner from the adhesive strip.

    Remove the tape in the shower wall. Press and hold and hold the back of the soap dish it.

    Wait one hour before using the shower.

    Shower Wall Adhesive

    Measure 16-inches below the showerhead on the wall and then 8 to 10″ up to to the -inch level on the wall. Mark this place using a bit of tape. This can be where the soap dish is to be installed.

    Put on a breathing apparatus to avoid inhaling safety eyeglasses and microscopic fiber glass fibers. In a patch, sand the the top of fiber glass shower wall the dimensions of the again of the soap-dish mount, devoted to where the tape was positioned by you. Wipe the region using a micro-fiber fabric to eliminate the sanding dirt down.

    Apply a bead of fiber glass adhesive across the perimeter of the again of the soap-dish mount.

    Press the mount contrary to the wall to transfer a few of the adhesive about it it. Remove the mount and wait three full minutes minutes for the adhesive to partly established.

    Press the soap dish mount from the wall. Wait 3 minutes and press the soap dish from the wall to make sure that it sticks.

    Wait 2 4 hours before utilizing the shower to enable the soap dish adhesive set or to totally cure.

  • The best way to Kill a Holly Tree Stump

    The best way to Kill a Holly Tree Stump

    The American holly (Ilex opaca) makes a declaration in almost any landscape with distinctly pointed leaves and red berries. Capable of expanding up to 40-feet, a holly is a big function that may occupy lots of space. Whether you want to recover that area for lawn or backyard use, or the tree is diseased or has died, when the tree is cut down, the stump is left left out. While it is possible to landscape around a holly tree stump, in the event that you if you wish to to destroy it there are two choices: take it off or let it decay.

    Physical Elimination

    Cut down the peak of the holly’s stump to just one foot-tall to ensure there’s enough trunk to to seize onto without getting in the manner of work.

    Dig the soil round the tree moving inward and employed in in a circle beginning two-feet in the trunk. Dig into a depth of 12 to 18-inches to eliminate soil from around the roots. Set any grime that was eliminated on the floor beside the hole.

    Sever any roots using an ax or the shovel head at points where the diameter has reduced to 2″ wide or less. Keep from sprouting up bigger roots connected to the trunk to avoid shoots. Continue reduce and to dig roots before the trunk is connected to the floor.

    Rock the trunk free to ensure it is not held by any roots . Lift the trunk successfully in the hole and discard. Fill in the hole using the soil and plant wanted.

    Decay Approach

    Lower the trunk’s peak to only several inches above ground-level using a saw. Dig round the stump beginning 6″ away from your trunk and remove the soil to three or four inches down.

    Cut the stump’s peak down again, this time to 2″ below floor level.

    Drill three to five holes as achievable as seriously to the stump. Pour fill the holes to the best and sluggish re-lease fertilizer granules to the holes.

    Cover along with your s Oil over the trunk that is handled. Pack the soil around and within the trunk to ensure it’ll not become un-covered and mound the s Oil up on the trunk.

    Add top-soil, if required, in case your loosened s Oil isn’t enough to pile on the trunk. The trunk decay above a period of years and will dieoff.

  • Companion Crops for Coneflowers

    Companion Crops for Coneflowers

    The coneflower (Echinacea purpurea) provides cheerful pink, white or purple daisy like flowers that start in midsummer. Hardiness and dimensions differ somewhat by species, but coneflowers usually prosper in U.S. Department of Agriculture hardiness zones 3 through 9, and most achieve from 2 to 3-feet high and 1 1/2 to 3-feet broad. Butterflies are attracted by the nectar of the coneflower, and in the conclusion of the the summer season, its seed heads provide food for birds. The greatest companion crops with this perennial that is charming are sun- . Don’t confuse echinacea with rudbeckia — both are occasionally generally called coneflower, but rudbeckia is most frequently known as black-eyed Susan.

    Bee Balm

    Bee balm (Monarda spp.) is comparable in dimensions to the echinacea plant and also starts blooming in early to midsummer. Both fragrant foliage and its flowers exude a powerful minty scent. Bee balm’s tightly clustered extended-tubed blooms entice bees along with hummingbirds and butterflies. Just like the coneflower, bee balm makes an excellent cut flower topic. Popular bee balm cultivars contain Raspberry Wine – blooms, and Blue Stocking, with big violet- flowers. Bee balm is hardy in USDA zones 3 through 9.

    Tickseed

    Tickseed (Coreopsis grandiflora) is hardy in USDA zones 4 through 9. This plant’s common name comes from its small black seeds, relished by smaller birds like finches. Tickseeds increase from 1 to 3-feet high and so are planted in the very front of the border. Tickseed’s dainty, finely cut foliage provides a helpful distinction to the coarser leaves of the coneflower. Interesting types contain Sun-Ray, with flowers that are double, and Early Sun Rise, with semi-double 2 inch flowers featuring darker heart disks and rays. At just one foot-high, Infant Sunlight is a dwarf choice with blooms of bright -yellow. As long as it’s kept deadheaded, flowers will be continually produced by a tickseed.

    Sedum Autumn Joy

    The pinkish blooms of Autumn Joy sedum (Sedum “Autumn Joy”) are one of the highlights of the fall garden, yet this plant’s desirable foliage contributes elegance and curiosity through the summer months too. Hardy sedum is just another perennial which is drought -resistant and unfussy about soil. In a mature height of 18 to 24-inches, the rounded type and fleshy leaves of Autumn Joy sedum produce a stylish foil when planted before the taller and much more narrow coneflower. Once its buds open, the sedum becomes a magnet for bees and butter flies.

    Blazing Star

    Blazing star (Liatris spicata), also also referred to as gayfeather, is hardy in USDA zones 4 through 9. Its 3- to 5-foot tall purple flowers rise from grasslike foliage and are of good use for offering a vertical accent in the backyard. The slender blooms seem from mid- to late-summer, and are beloved by flower arrangers and butterflies a like. Star buds have the routine of opening from your most effective of the stem.

  • Diseases Impacting Weeping Mulberry Trees

    Diseases Impacting Weeping Mulberry Trees

    The weeping mulberry tree (Morus alba “Pendula”) grows in U.S. Department of Agriculture plant-hardiness zones 4 to 8, where it heartily tolerates heat, drought and most soil types. Unlike other kinds of mulberry, which drop on walk ways and nearby vehicles, the mulberry does not bear fruit. This little tree – which lends itself to outside areas as a a definite accent plant – resists most pests and diseases, although it’s susceptible to some common afflictions.

    Bacterial Illness

    The blight Pseudomonas syringae impacts trees for example, mulberry, of the Morus genus. This illness, indicated by the look of water-soaked spots on leaves and black- shoots, kills the foliage and branches of the tree. As can pruning shoots throughout autumn fungicides handle blight. Bacterial leaf scorch, an illness that is rare, causes dying and and finally leaf browning. Injections of the anti biotic oxytetracyclene aid extend the existence of the tree although there isn’t any cure for leaf scorch.

    Cankers

    Nectria cinnabarina, coral place cankers, cause in weeping trees, twig die-back. This fungus – which also impacts apple, ash, birch, maple and oak trees – creates pink fruiting sporodochia to the bark of the tree. Coral place canker usually seems close to the branch suggestions of the mulberry. Prevention serves as the most useful remedy for cankers. Keeping soil moisture without over-watering wrapping youthful trees subjected to severe sunlight and reducing wounds in the tree’s bark aid avoid coral place cankers.

    Mildew

    Mildew grows on the lower leaf surfaces of mulberries that are stricken, producing a white, powder-like coating. General- appropriate aeration and use fungicides stop this illness. The disease identified as Mycosphaerella mori, or fake mildew, manifests on the under side of leaves. These patches, which come in in the summer, give way to spores that are yellow and and in the end cobweb – . Fungicides avoid bogus mildew, which is often medicated by burning and by by eliminating leaves that are impacted.

    Root Rot

    Sometimes mulberry trees fall victim to root-rot, a type of invasion that causes unexpected withering and drying of the root-system. This deadly illness spreads to around crops and usually happens as an effect of over-watering. Root-rot is seldom treated by additive remedies effectively. Chemical manage solutions are offered by applicators, but these has to be re-applied annually or bi-yearly. Weeping mulberries that are affected burned and must be uprooted and the s Oil handled having a fungicidal answer.

  • The best way to Dig Out an Outdated Bird of Paradise

    The best way to Dig Out an Outdated Bird of Paradise

    As they age, several bird of paradise plants (Strelitzia reginae) cease blooming as a result of lack of nutrients caused by poorly compacted roots. Many gardeners choose to seek out the crops out to divide and re-plant them when they fail to bloom for many years, or to discard them entirely. Digging out old bird of paradise plants may be difficult due to their dense, large rootball while simple in concept. In the event that you’ve some help lifting the large, unwieldy crops in the bottom however, using the correct resources, it’s entirely feasible to eliminate the crops in just several hours.

    Cut back the bird of the leaves of paradise, flower-stalks and stems utilizing sharp, pruning shears that are strong. Them back to walk out to produce the elimination procedure more easy. Discard the foliage that is pruned in a green waste can.

    A hose for 20 to 30 minutes in the bottom of the bird of paradise the evening before digging it up. Water for another 20 to 30 minutes to more soften the roots and surrounding soil. Let the water soak in for roughly a half hour before digging.

    Measure – to 10-inch radius round the bottom of the bird of paradise utilizing a measuring tape. Etch the line across the plant using the suggestion of a sharp-shooter or trenching shovel to offer a guide line the plant out out.

    Insert the blade of the trenching or sharp-shooter shovel to the soil over the line. Dig along into a depth of at least 18 to 20-inches, which is the depth of most bird of paradise plant’s roots.

    Strike the core of the crown that is foliage frequently using a mattock to break the area roots up. Before it is possible to insert the blade of your sharp-shooter shovel to the middle of the plant chip away at the roots. Therefore it’s somewhat mo-Re manageable items, in smaller pry aside the root crown with all the shovel.

    Work the suggestion of the shovel with an angle below the fringe of of the rootball. The shovel’s handle again toward your chest to pry the rootball unfastened from your soil. Repeat this a-T least four-times across the chicken of paradise plant to split the roots that connect it to the s Oil.

    Ask two or a buddy to aid raise the fowl of paradise in the ground in the place of tackling it-yourself since the crops are excessively large when mature. Grip the edge of the rootball and watchfully raise it in the bottom. Fill in the hole left with backyard soil by the plant.

    Cut the root ball up in to components that are equivalent and replant them or discard the entire plant in a green waste can. Given that they are going to simply consider root don’t try to compost entire bird of paradise crops.

  • From Obtaining in Through Basement Windows, the best way to Keep Water

    From Obtaining in Through Basement Windows, the best way to Keep Water

    Windows that leak usually result in battles and issues . Instead of allowing towel after towel that is soggy to cope with leaking basement windows, fight dampness by utilizing assorted handles to stop water from leaking through the windows into your basement and inspecting the region around basement windows. Most problems could be managed at home though some basement issues will will need the help of a specialist contractor.

    Check your gutters and down spouts to make certain they are not draining also near to your windows. Remove any leaves and rather are creating the water to not in the spout and particles which might be preventing your gutters from draining in to your down-spouts. Overflowing spouts can fill your window wells with water. Inspect your downspout extensions to ensure they have been draining at least four-feet away out of your home.

    Window wells to ensure they have been installed properly and consequently have their drains associated with foundation drains.

    Obtain window covers to will stop rain-water from falling to the well region and through basement windows. Covers can differ in form and size — some are flatter to look at, while the others are huge, sloping addresses therefore water can drain from the window.

    Fill each hole with stone which is about 1/2 inch in dimension if you prefer to not use window well covers and dig about 2-feet below each basement windowsill. Keep a room of approximately 3″ between the stone as well as the windowsill. Stone will permit water to drain away and rapidly out of your basement windows.

  • The best way to Align a Do-Or With Hinge Shims

    The best way to Align a Do-Or With Hinge Shims

    Your doorways may go wrong properly over time as the wood door casings shrink and expand together with the changing climate or as the house settles. The do or may swing closed on its own or may quit connecting to the latch. There’s an easy fix to align your door: hinge shims. Even though it is possible to purchase hinge shims, there is no need. Save the cash and minimize your hinge shims from cardboard or poster board.

    Lay an even over the edge of your door. Determine if the door is leaning outward from the bottom or the top. The angle is probably minor, therefore look carefully in the bubble in the level to find out which way it’s tilting.

    Ask a friend. Alternatively, spot a little guide or wood block underneath the corner of the door below the door-knob to support the up the door while you perform using the hinges.

    Remove the screws in the right hinge where it satisfies the wall using a screw-driver. Remove the hinge in case the door is tilting outward in the top. Remove the hinge when it’s tilting outward in the bottom. In order for the door hangs plumb the aim would be to get both level. Do not remove the screws from the wall from the door, just the kinds.

    Lay an item of copy or note-book paper within the side of the hinge you eliminated in the wall. Trace the outline of the hinge on the paper. Cut out the outline to generate your template that is hinge.

    Trace the template on an item of poster-board or cardboard that is thin. Cut the form out.

    Put the shim on the wall wherever your hinge rests. Screw your hinge straight back in the wall, since the the shim.

    Near and open your do-or, then allow it hang to check if the do-or is now le Vel enough to function properly. In case the issue persists, repeat the procedure to add a shim that is second to the hinge.

  • Cottonwoods & Caterpillars

    Cottonwoods & Caterpillars

    It’s difficult to acknowledge that perhaps one of the most of the most treasured and least feared team of bugs could be liable for the destruction to such valuable assets as trees. That colourful butterfly flitting about your backyard or that moth that is harmless circling your patio lantern was probably, in its stage, harming a near-by tree. The form of moths and butterflies, caterpillars, usually prey on crops. Trees, including Populus species and cottonwood, are vulnerable to these pests.

    Cottonwoods

    Named the tree creates trees belong to the genus Populus in the family. This deciduous tree is current all through The United States with one specific species indigenous to U.S. Department of Agriculture plant-hardiness zones 8 through 10. Freemont’s cottonwood (Populus fremontii) reaches heights more than 100 100 feet and usually grows near rivers, streams and wetlands. Bark on young trees is easy, but it is deeply furrowed on trees that are ageing. The leaves are heart-shaped with serrated edges. Enhance water quality and cottonwoods aid to control erosion.

    Wood-Boring Caterpillars

    While some caterpillars feed on delicate plant tissue-like flowers, leaves and fresh fruit, a number of pests bore to the wood. The hornet moth as well as the western poplar clearwing fit in with the moth family Sesiidae. As adults, these moths are usually mistaken for wasps due to human anatomy coloring their wing form and flight habits. Caterpillars of these clearwings are 1 1/2 inches long with a head. black creamy-white body and The carpenter worm is an alternative wood-boring pest of cottonwood. This moth is mottled grey having a wing span of up to 3″. Its larvae are greenish-white caterpillars using a head that is dark. They are able to grow up to 3″ long.

    Foliage-Feeding Caterpillars

    Hundreds of butterfly and moth caterpillars are generalist feeders consuming the leaves of a broad number of species. A few of these generalists are recognized pests to cottonwood. The tussock moth caterpillar is distinctive having a pair of hair tufts that are long protruding from four tufts on its back and the front of the bodies. The fall webworm as well as the tent caterpillar are effortlessly recognized by their conduct in huge silken tents on trees that were infested. Soft- hairless caterpillars that feed on cottonwood contain the big, green tiger swallow-tail as well as the tiny, white fresh fruit tree leaf roller. Further pests contain the spiny elm caterpillar, the moth caterpillar as well as the red caterpillar.

    Damage and Therapy

    The injury to cottonwoods from foliage-feeding caterpillars is usually apparent as leaves are rolled or chewed. Hand eliminate the pests as well as their eggs and dump these in water where feasible. Predators including parasitic wasps are successful against caterpillars and are obtainable. A spray program of the bacterium Bacillus thuringiensis on youthful caterpillars is helpful in eliminating or decreasing leaf-ingesting larvae. Sawdust around holes in the trunk and insect droppings are all indicators of a wood-uninteresting pest. Chemical remedies for the pest are ineffective after the larvae are inside the wood. The most readily useful get a grip on against wood-uninteresting caterpillars is prevention. Pheromone traps stop males from mating with women. Inspect the bark often for eggs and take them off by brushing or scraping right into a bucket of water.

  • Spider Mites on an Apple Tree

    Spider Mites on an Apple Tree

    Though they’re small, many spider mites that are hungry inflict severe injury. Most pesticides are of limited use against spider mites, but maintaining trees healthy and getting several cautionary measures are the greatest coping mechanisms for dealing with one of these pests that are pernicious.

    What’re Spider Mites?

    Tiny family members spider mites, of typical spiders, scorpions and ticks might be brown, red, green or yellow, with respect to the species and time of yr. Spider mites create particularly if they infest crops in huge figures webs, guard themselves from climate and to shelter their eggs. Eggs are usually laid near to the veins of leaves, in accordance with Colorado State University, and therefore are larger compared to spider mites which lay them.

    Signs of Spider Mites

    Inspect apple trees frequently till they dominate and get charge of the situation. Leaves have yellow, white or tan places and could possibly be coated in webbing. Some leaves may turn yellow and drop off. The spider mites although their tiny size makes them hard to see themselves might also be obvious. The apples are unlikely to be harmed unless a spider mite infestation goes unchecked for extended durations.

    When Spider Mites Prosper

    Be mindful of specific circumstances which are beneficial to spider mites, or inspire them to be energetic. Warm dry and dusty climate exacerbates spider mite issues, as the mites need to feed more and become thirsty, creating extreme harm to crops. Using like lacewing larvae and lady bugs pesticides that kill the natural predators of spider mites, also permits their figures to swell. Spider mites are n’t harmed by these pesticides.

    Coping

    For a lot of gardeners, spider mites are a reality of existence, therefore keep apple trees in best health, enabling them to withstand several mites there and here. Introducing predatory mites, bigeyed bugs and sixspotted thrips will keep spider mite populations under control. Water apple trees frequently dehydration makes them susceptible to spider mite injury, and hose them down to eliminate dirt, avoiding finish-of-time infestations, as stated by the College of California a-T Davis.